In this guide, we’ll dive into the versatile world of the Highlighted Text custom element. Whether you want to draw attention to key phrases, create visually engaging paragraphs, or simply add a touch of flair to your content, Highlighted Text has you covered.
Adding Highlighted Text to your Page #
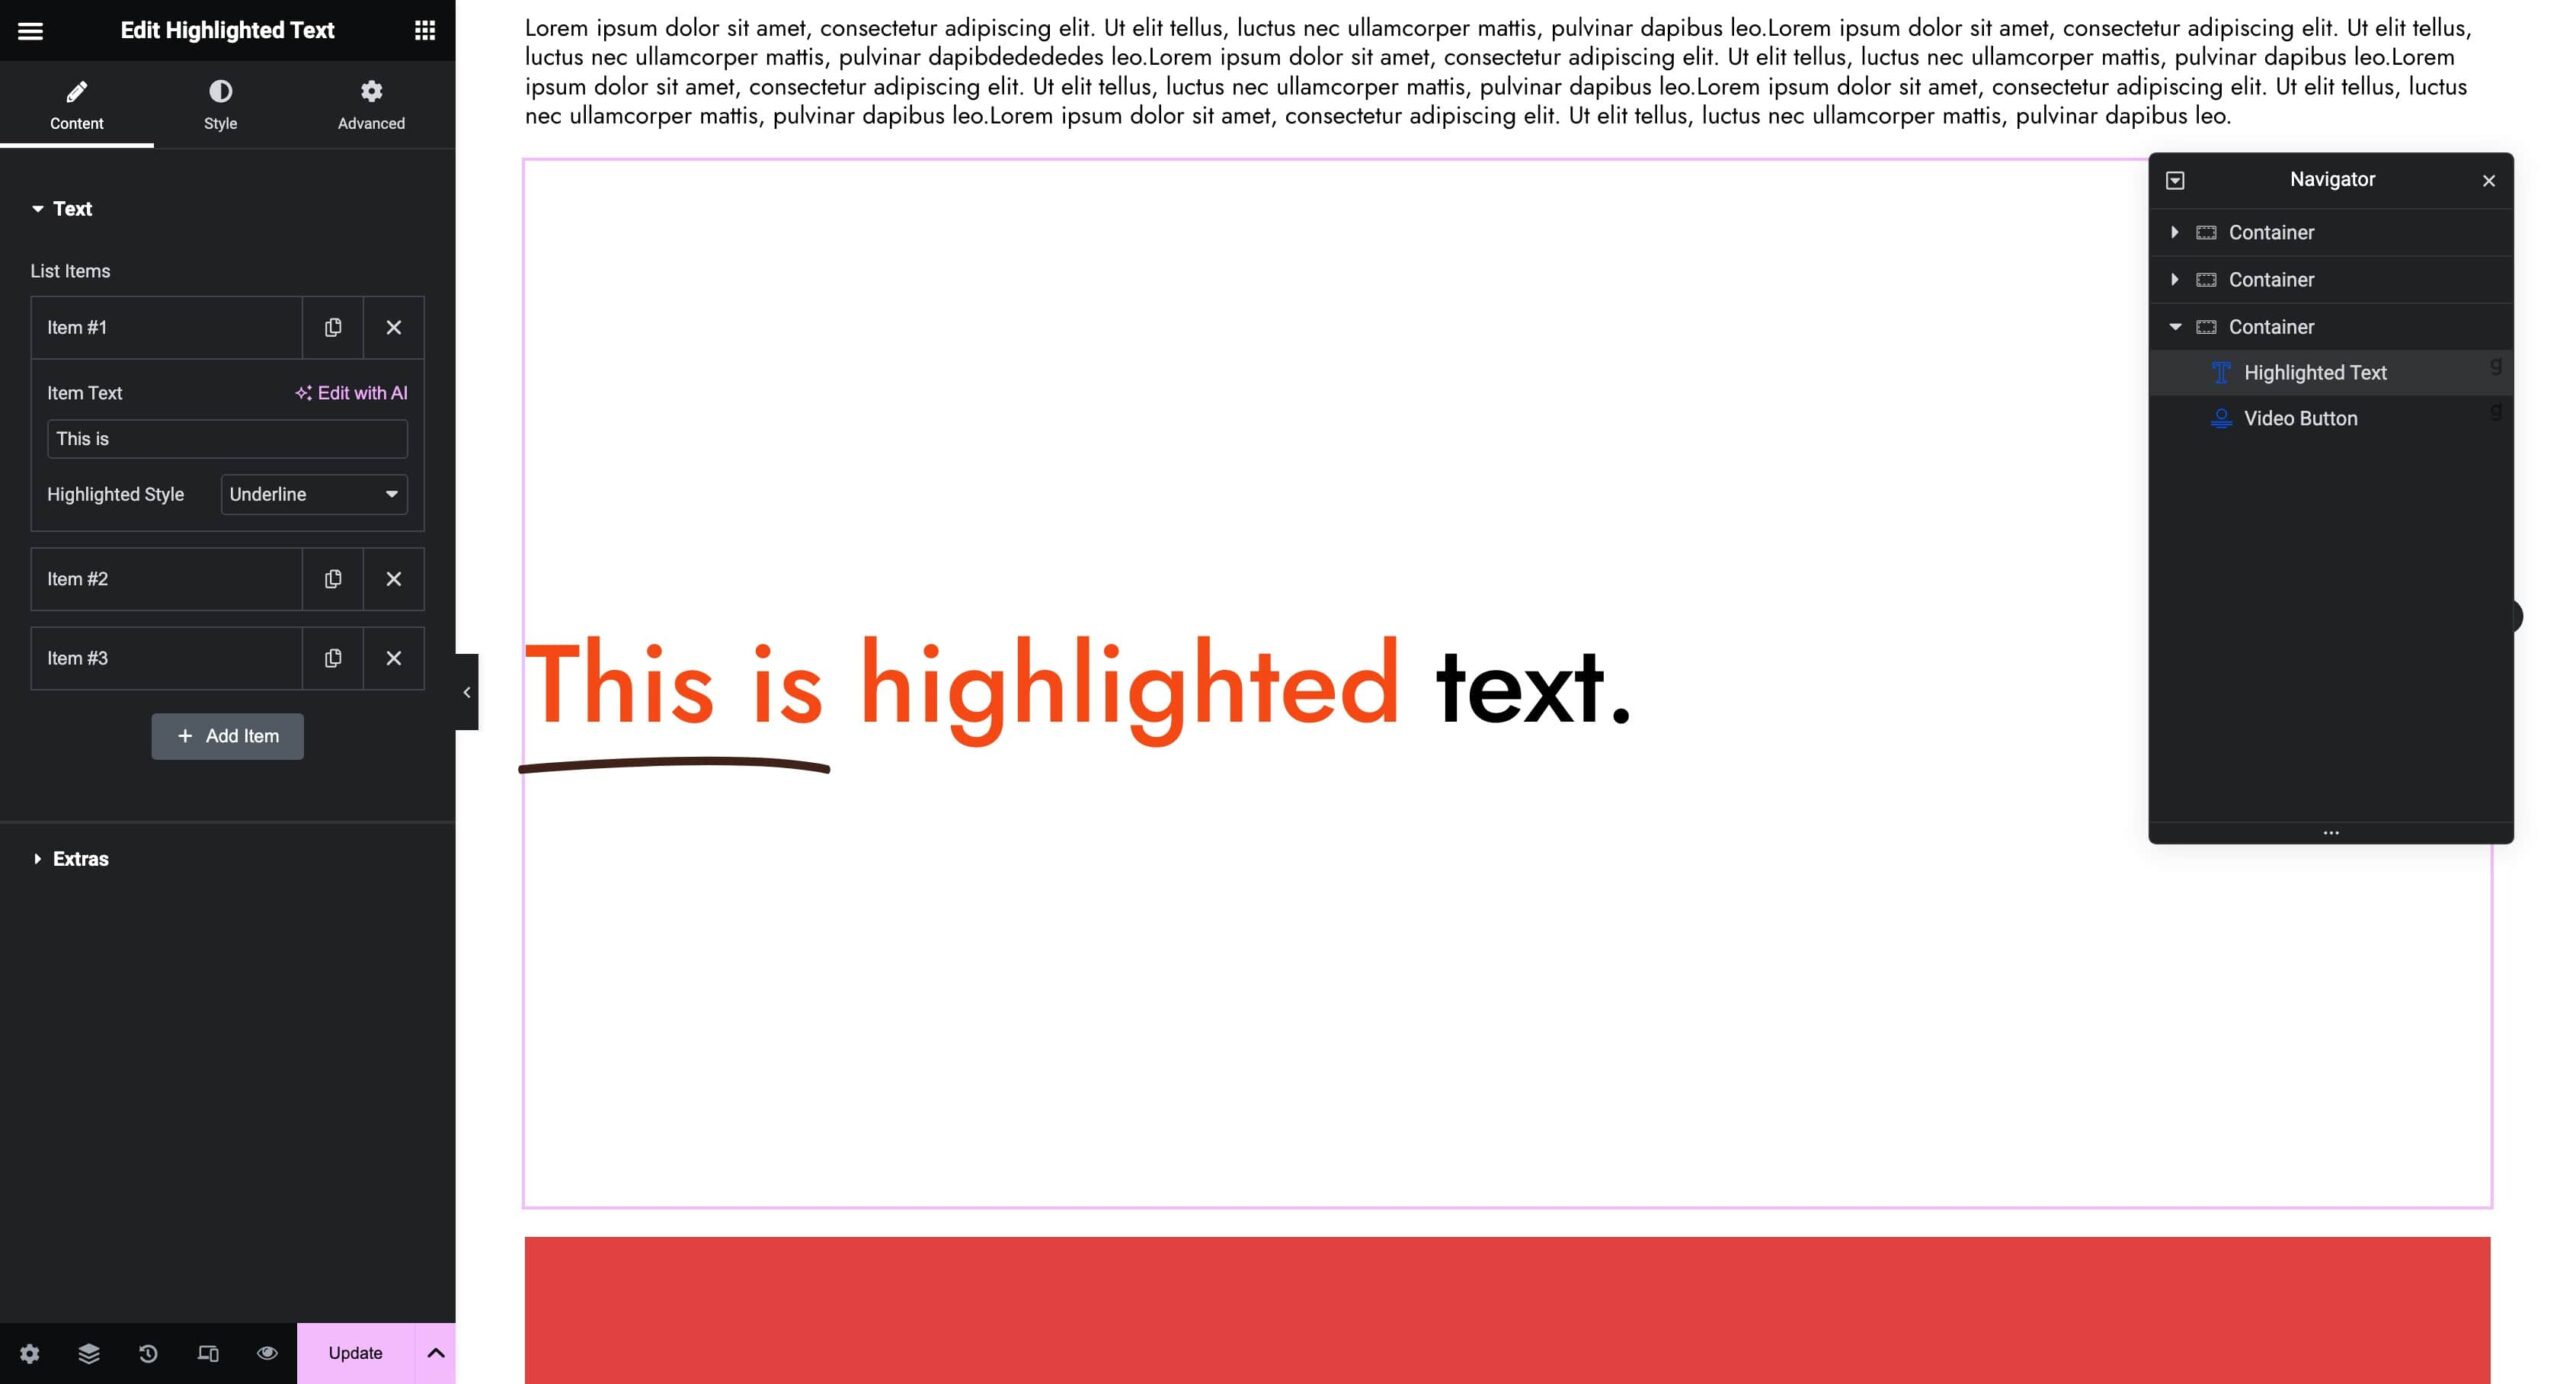
Locate and Add Highlighted Text:
- Navigate to your Elementor editor and find GW Elementor Addons elements.
- Add the Highlighted Text element to your page.
Utilizing the Content Tab:
- Open the Content tab to access the powerful repeater feature.
- Add as many texts as you need, each with its own unique Highlighted Text settings. Choose from None, Color, or Underline for each text, giving you the flexibility to compose dynamic phrases or paragraphs.
Styling your Highlighted Text #
Content Style Settings:
- Head to the Style tab and navigate to Content Style.
- Customize alignment per device, set SEO tags, define typography, and choose your text color.
Highlighted Text Style Settings:
- Still, in the Style tab, move to Highlighted Text Style.
- Personalize the Text Color, choose the Stroke (underline) color, adjust the width, and fine-tune the vertical position.

Going Beyond with Advanced Options #
Unlocking Advanced Features:
- Explore the Advanced tab to access all default Elementor options.
- Use the extra powerful Elementor functionalities to refine and optimize your Highlighted Text.
Experiment with different styles, unleash your creativity, and let your content shine with the GW Elementor Addons by Greatives!


